How to Assemble RTA Cabinets: A Step-by-Step Guide
By TC Wholesale Cabinetry · Editorial team
June 26, 2026 · 7 min read
Ready-to-assemble cabinets arrive flat in a carton, and the only thing standing between that box and a finished kitchen is an afternoon of straightforward work. The good news is that learning how to assemble RTA cabinets is closer to building flat-pack furniture than to carpentry. Every panel is pre-cut and pre-drilled at the factory, the hardware comes in the box, and you join the pieces with a small handful of basic tools. This step-by-step guide walks through the whole sequence — from the first cam lock to the final soft-close adjustment — so you know exactly what to expect before the freight truck pulls up.
We will cover the tools you need, the exact order to build a base cabinet, how wall and tall units differ, how to fine-tune soft-close doors and drawers, and how long the job realistically takes. We will also be honest about one important line: assembling the boxes is something most handy homeowners can do, but mounting cabinets to a wall carries real structural stakes and is often a job for a qualified installer. We will flag exactly where that line falls.
What tools do you need to assemble RTA cabinets?
You need surprisingly little. A cordless drill or screwdriver, a rubber mallet, a carpenter's square, a tape measure, and a clean padded surface to protect the finished faces will assemble almost any RTA cabinet. Many boxes use cam-lock fasteners you can turn by hand or with a screwdriver, so even the drill is more of a convenience than a strict requirement. Treat the included hardware instructions as the final word — they are written for your exact unit.
RTA panels are machined to fit, which means assembly is alignment and fastening, not measuring and cutting. The tool list stays short because the factory has already done the precise work. Here is the practical kit most people reach for:
- Cordless drill or screwdriver — a #2 Phillips bit drives screws and cam bolts quickly; keep the clutch low so you do not strip or overdrive.
- Rubber mallet — seats panels into their grooves and taps dowels home without bruising the finish a metal hammer would.
- Carpenter's square — the single most important check; a box that is not square will fight you when doors go on.
- Tape measure — to confirm the diagonals match and the box is true before you tighten everything.
- Padded surface or moving blanket — assemble face-down on a soft, flat floor so finished panels stay scratch-free.
- Clamps (optional) — a couple of bar or spring clamps hold a corner square while you set the first fasteners solo.
How do you assemble a base cabinet?
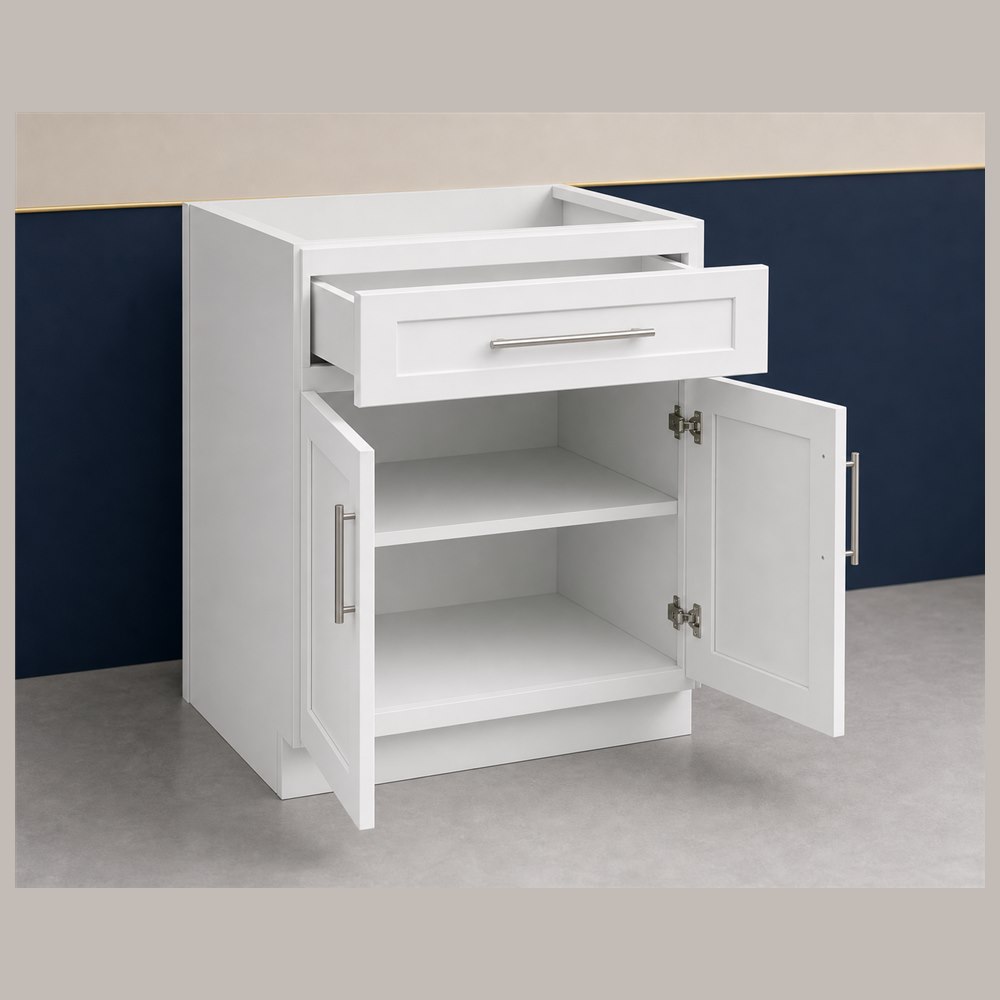
Assemble a base cabinet in five moves: lay out the labeled panels, join the sides to the bottom and the stretchers with cam locks or dowels, check the box for square, slide in and fasten the back, then hang the doors and drawer fronts last. Work on a clean, padded surface so the finished faces stay protected, and confirm the box is square before you fully tighten anything down.
A base cabinet is the workhorse of the kitchen and the best unit to learn on, because once you understand its sequence every other cabinet is a variation on the same idea. Most RTA boxes use cam-lock fasteners — a steel cam that rotates to grip a bolt, drawing two panels tight without glue or clamps — paired with dowels that locate the joint. Lay your parts out and match each panel to the instruction sheet before you fasten a single one; five minutes of sorting saves a frustrating disassembly later. Then work in this order:
- Lay out and identify every panel. Sides, bottom, back, stretchers, shelves, doors, and a bag of hardware. Confirm which face is the show face and keep those facing the padding.
- Stand one side panel up and attach the bottom. Set the bottom's dowels and cam bolts into the side, then rotate the cams a half-turn to draw the joint tight.
- Add the second side, then the stretchers. The top stretchers (the rails that brace a base box where there is no full top) lock the frame and keep it rigid. Snug every cam at this stage, not fully tight.
- Check the box for square. Measure both diagonals; equal diagonals mean a square box. Tap a corner with the mallet until they match, then fully tighten all the cams.
- Slide in and fasten the back panel. The back drops into a grooved dado or sits in a rabbet; fixing it is what locks the cabinet permanently square, so do not skip it.
- Mount the doors and drawer fronts last. Clip the doors onto their hinges and set the drawer boxes on their glides; final alignment comes in the soft-close step below.
The square check in step four is the one that separates a clean install from a fight. If the diagonals are off by even a quarter inch, your doors will sit unevenly no matter how much you fiddle with the hinges afterward. On a well-made line the soft-close hinges and undermount glides arrive already mounted to the doors and drawer boxes, so this last step is clipping and aligning rather than installing hardware from scratch.
How is assembling a wall cabinet different?
A wall cabinet assembles almost exactly like a base cabinet — the same cam-lock box, the same back panel, the same door mounting — only it is smaller and lighter, so it usually goes together faster. The real difference comes after assembly. A wall cabinet has to be mounted overhead, where it carries the weight of dishes and faces real load. Building the box is the easy half; hanging it safely is where care matters most.
Because a wall cabinet has a full top and bottom (no open stretcher frame), the box is quick to close up and very rigid once the back is fixed. The assembly steps mirror the base cabinet, so you will already know the rhythm by your second or third unit.
How is a tall or pantry cabinet different?
A tall or pantry cabinet uses the same joinery as a base, just with longer side panels, more shelves, and full-height doors. The two practical differences are size and leverage: the panels are unwieldy, the box is easy to rack out of square while you maneuver it, and standing the finished unit upright is genuinely a two-person move. Plan for a helper and a clear, flat work area.
Assemble a tall cabinet flat on the floor, exactly as you would a base box, then square it carefully — long panels exaggerate any twist, so the diagonal check matters even more here. Fix the back fully before standing the cabinet up; the back is what holds those long sides parallel and stops the box from flexing into a parallelogram. When it is time to raise it, lift with a partner rather than walking it up a corner at a time, which can stress the joints you just set. Like wall cabinets, a tall pantry is heavy once loaded, so the same advice applies to mounting and securing it: defer the anchoring decisions to the hardware instructions and a qualified installer.
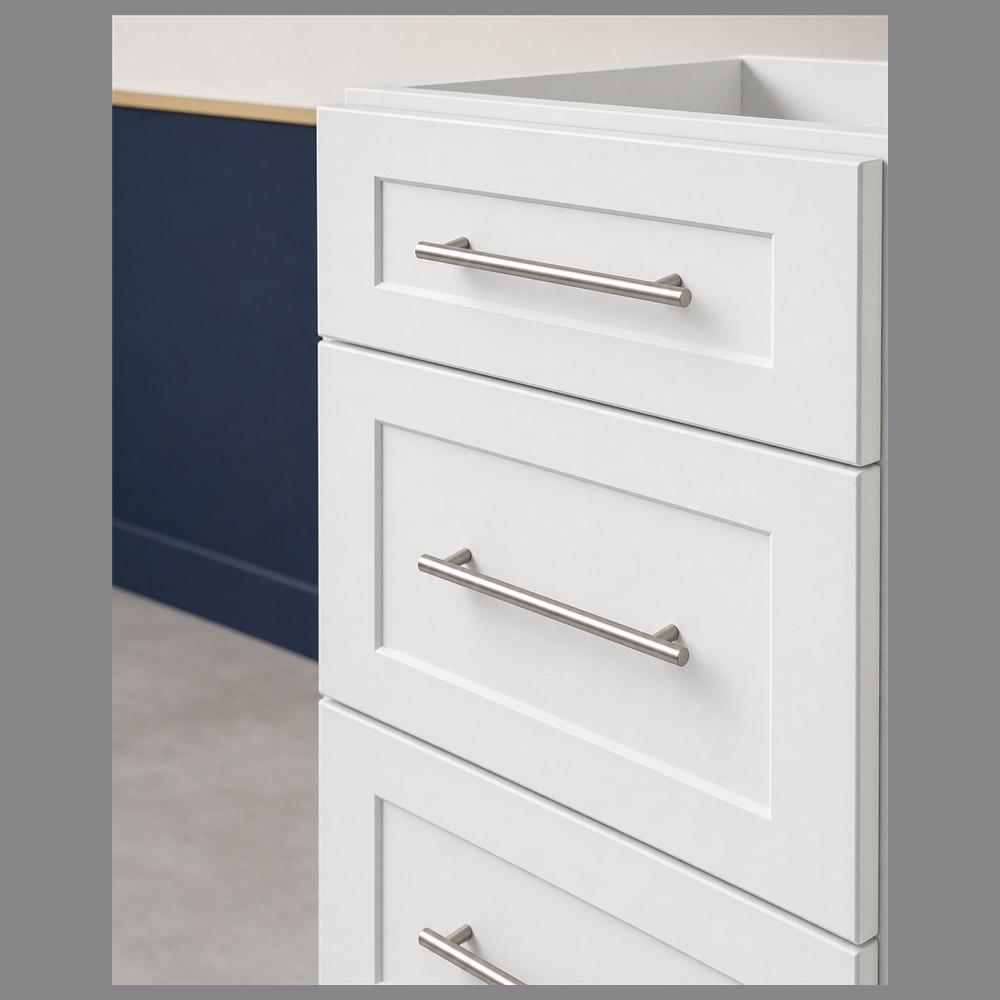
How do you adjust soft-close doors and drawers?
Concealed European hinges have small adjustment screws that move the door in three directions — up and down, in and out, and side to side. You turn those screws to bring every door flush and the gaps between them even. The soft-close action itself is built into the hinge and the drawer glide, so you are not adjusting how softly it closes, only aligning the door or drawer front so it sits right.
Work one door at a time and make small turns. The side-to-side screw closes or opens the gap against the neighboring door; the depth screw pulls the door closer to the box or pushes it out so it sits flat; the mounting-plate screw raises or lowers the whole door. Adjust until the reveal — the gap around each door — looks consistent across the run, because the eye reads an even gap as quality far more than it reads a perfectly centered one. Drawer fronts adjust similarly: most undermount systems have a cam or clip under the drawer box that nudges the front up, down, or sideways so it lines up with the doors around it.
How long does it take, and can one person do it alone?
Plan on roughly 20 to 40 minutes per cabinet once you find your rhythm — a small wall cabinet is quick, while a sink base with extra bracing or a tall pantry takes longer. The very first box is always the slowest as you learn the sequence. One person can comfortably assemble base and wall cabinets alone; tall and oversized units are easier and safer with a second pair of hands, mostly for lifting.
For a typical mid-size kitchen of a dozen or so cabinets, a careful first-timer should budget a focused weekend, while a two-person team or someone who has done it before can finish in a day. There is no rule that says you must build them all at once, either — flat-packed cartons store neatly until you are ready, so spreading the work across a few evenings is perfectly valid and is a real advantage over a delivery of bulky pre-built boxes that immediately eats your floor space. These figures are general guidance to set expectations, not a guarantee; your pace depends on the cabinet mix, your tools, and how much room you have to work.
Should you assemble RTA cabinets yourself or pay for installation?
Assembling the boxes is a reasonable DIY project for most handy homeowners. The part worth weighing is installation — mounting cabinets level and plumb, securing wall units overhead, scribing to uneven walls, and any plumbing or electrical work around a sink or appliance. You can absolutely split the difference: build the cabinets yourself to capture the flat-pack savings, then hire a pro for the hanging and leveling. The cost to install RTA cabinets depends on your layout, your cabinet count, and local labor rates, so there is no single number that fits every kitchen.
Be clear-eyed about which tasks belong to a professional. Mounting wall and tall cabinets safely, anchoring into framing, and any electrical or plumbing connections are not the place for guesswork — those are structural and safety-critical steps where a qualified installer (and a permit, where one is required) protects you. Once your boxes are assembled, hanging them is essentially the same job as installing pre-assembled kitchen cabinets, minus the assembly you have already done; the skill you are paying for is the precise, safe mounting, not the screwing-together.
If you are still deciding whether the flat-pack route is right for you, our honest look at whether RTA cabinets are worth it weighs the trade-offs in plain terms. And to plan a realistic budget that includes assembly time or installer labor, see our kitchen cabinet cost guide. Before you commit to a full order, order a door sample to feel the all-plywood box and soft-close hardware in person. When you want a figure for your actual kitchen rather than a generic estimate, send your layout for a free quote — it is the only honest way to price your specific cabinet list.
Keep reading
- Are RTA Cabinets Worth It? An Honest Buyer's Guide
Ready-to-assemble cabinets cut cost by shipping flat — but quality lives in the box material, not the assembly. An honest look at whether RTA is right for you.
- How Much Do Kitchen Cabinets Cost? RTA vs. Assembled vs. Custom
Kitchen cabinet cost comes down to three things — material, construction, and how you buy. An honest, no-sticker-shock breakdown of RTA, assembled, semi-custom, and custom pricing by the linear foot, plus the hidden costs of hardware, countertops, and installation.
Ready to plan your kitchen?
Send us your layout for a free, no-obligation quote, or browse the full factory-direct catalog of all-plywood Shaker cabinets.