How to Measure Your Kitchen for New Cabinets
By TC Wholesale Cabinetry · Editorial team
June 26, 2026 · 7 min read
Every accurate cabinet order starts with an accurate sketch of the room, which is why knowing how to measure kitchen for cabinets is the single most valuable skill before you spend a dollar. The good news is that it takes a tape measure, a pencil, and about thirty unhurried minutes — not special tools. This kitchen measuring guide walks through exactly what to record and in what order: the wall-to-wall lengths, the windows and doors, the outlets and vents, the appliances and their centerlines, the ceiling height and any soffits, and the working clearances that keep the finished kitchen comfortable to cook in. Get those numbers right once and the rest of cabinet layout planning falls into place around them.
Below is the plan-view sketch you are working toward — a top-down map of the room with every wall, opening, and fixed appliance marked. Keep it in mind as you read; each measurement in this guide adds one more labeled dimension to a drawing exactly like this one.
What do you need before you measure?
Before you measure, gather a 25-foot tape measure, a pencil, graph paper or a printed grid, and a phone for photos. Then clear the counters and open any cabinet doors that block a wall. The goal of this first step is a rough plan-view sketch of the room — one box per wall — that you will fill in with real numbers. Measuring is far easier when you have somewhere to write each dimension down.
A tidy sketch is the whole game. Stand in the doorway, look at the room from above in your mind, and draw each wall as a line, joining them into the shape of the floor — a simple rectangle, an L, a U, or a galley with two facing runs. Label the walls A, B, C, and D so every measurement has a home. Work in inches throughout (not feet-and-inches), because cabinets are specified in inches and mixing units is where mistakes creep in. Take a few wide photos too; they catch the outlet you forgot to note and settle any later "wait, which wall was that?" question.
- 25-foot tape measure — long enough to span a full wall in one pull, so you avoid the errors that creep in when you leapfrog a short tape across a long wall.
- Graph paper or a printed grid — let one square equal a set number of inches and the sketch stays roughly to scale, which makes obvious mistakes obvious.
- Pencil and eraser — you will revise; ink locks in your first guess.
- A second person — one holds the tape's dumb end in the corner while the other reads, which removes sag and guesswork on long walls.
- Your phone — wide photos of each wall and close-ups of outlets, valves, and the panel give you a reference you cannot lose.
How do you measure walls for cabinets?
Measure each wall wall-to-wall — corner to corner — at countertop height, roughly 36 inches off the floor, where the cabinets actually sit. Record that single number for every wall before you measure anything inside it. Walls are rarely perfectly straight or square, so this baseline length is the figure every cabinet run has to fit within, and it is the one number you cannot afford to round.
Work around the room in one direction and follow the same sequence on each wall so nothing is skipped. Pull the tape tight and level, read to the nearest 1/16 inch, and write the number on that wall's line in your sketch. Then go around a second time and confirm each length — a two-minute re-check here prevents an expensive surprise later.
- Measure the full wall, corner to corner. One continuous pull at about 36 inches off the floor. This is the master length the run must fit inside.
- Re-measure at floor level and again near the ceiling. Old walls bow; if the three numbers differ, use the smallest so your cabinets are never wider than the wall at its tightest point.
- Check the corner for square. Hold the tape into the corner — if walls lean, note it, because an out-of-square corner needs a filler strip to absorb the gap.
- Mark your starting corner. Pick one corner as zero and measure every feature on that wall back to it, so all of a wall's dimensions share one reference point.
- Write each number in inches, then total them. The features you mark next should add up to the full wall length — if they do not, find the gap before you order.
That last cross-check — confirming the parts sum to the whole — is the habit that separates a clean order from a costly one. If a 132-inch wall's openings and segments only add to 129 inches, three inches have gone missing somewhere, and it is far cheaper to find them now than after the freight truck arrives. A sink base under a window anchors most kitchens, so measure carefully to the window's edges as you go.
How do you record windows, doors, and appliances?
For every opening and appliance, record two things: the distance from your starting corner to each edge, and the centerline. Mark windows, doors, the sink drain, the range, the refrigerator, the dishwasher, every outlet and switch, and any vent or duct. These fixed points decide where cabinets can and cannot go, so a layout is really just standard boxes arranged around them.
Centerlines matter more than you would expect. The sink usually centers on the window for symmetry, the range centers in its run for elbow room, and a hood or upper cabinet centers over the range — so noting each centerline now lets the cabinet sizes resolve cleanly later. Capture height as well as width: the bottom and top of each window, the height of outlets above the counter, and where the gas valve or water supply sits, because those determine whether a cabinet back needs cutting and whether a wall cabinet will clear the window trim.
- Windows — distance from the corner to each side of the trim, the width, and the height of the sill and head above the floor. Note the centerline; the sink and its base usually align to it.
- Doors and their swings — the opening width and which way the door swings, so a cabinet, drawer, or appliance door will not collide with it.
- Sink and plumbing — the centerline of the drain and the location of the supply valves, which sets the sink base width and position.
- Range and cooktop — the opening width (a freestanding range needs a 30-inch gap) and the gas or 240-volt outlet location behind it.
- Refrigerator — the opening width and depth it needs, plus room for its doors to swing clear of an adjacent wall or cabinet.
- Outlets, switches, and vents — height above the counter and distance from the corner, so cabinet backs and fillers can be notched where required.
Do not forget the third dimension. Measure the ceiling height in a few spots — it can vary across one room — and note any soffit or bulkhead above the wall cabinets: its height, depth, and where it starts and stops. Soffits cap how tall your wall and pantry cabinets can be, and an 8-foot versus 9-foot ceiling changes whether a 30-, 36-, or 42-inch wall cabinet is the right call. Photograph the electrical panel, any radiator, and the floor register while you are at it.
What clearances matter most in a kitchen layout?
Working clearances are the gaps that keep a kitchen usable: roughly a 42-inch walkway in a one-cook kitchen and 48 inches where two people pass or a galley faces itself. Appliances need their own gaps too — about a 30-inch opening for a standard range, around 36 inches for a refrigerator, and a 24-inch slot beside the sink for a dishwasher. These are widely used industry clearances, not brand rules, and they protect the layout from feeling cramped.
Plan the empty space as deliberately as the cabinets. The aisle between two opposing runs, or between a run and an island, wants 42 to 48 inches so drawers and appliance doors can open while someone walks behind. Leave clearance for doors that swing into the room — an oven door drops about 18 to 20 inches, a dishwasher door similar, and a refrigerator door needs room to clear the handle and the next cabinet. Wall cabinets are typically hung with their underside 18 inches above the countertop, which keeps the first shelf in reach and leaves working room for small appliances below.
- Main walkway — about 42 inches for one cook, 48 inches where two people work or pass.
- Range opening — roughly 30 inches for a standard freestanding range, with non-combustible clearance to any adjacent tall cabinet.
- Refrigerator opening — about 36 inches wide plus depth and door-swing room; counter-depth and standard models differ, so measure the actual unit.
- Dishwasher — a 24-inch opening directly beside the sink cabinet for the shortest plumbing run.
- Counter landing space — a stretch of counter beside the range, sink, and refrigerator gives you somewhere to set things down.
- Wall cabinet height — about 18 inches of clearance above the countertop to the underside of the uppers.
One honest caveat: treat appliance numbers as starting points, then measure your actual units. A counter-depth refrigerator, an apron-front farmhouse sink, or a slide-in range can each shift an opening by an inch or two, and that inch is exactly what decides whether a cabinet fits. When in doubt, find the appliance's own spec sheet and use its rough-opening dimension rather than a rule of thumb.
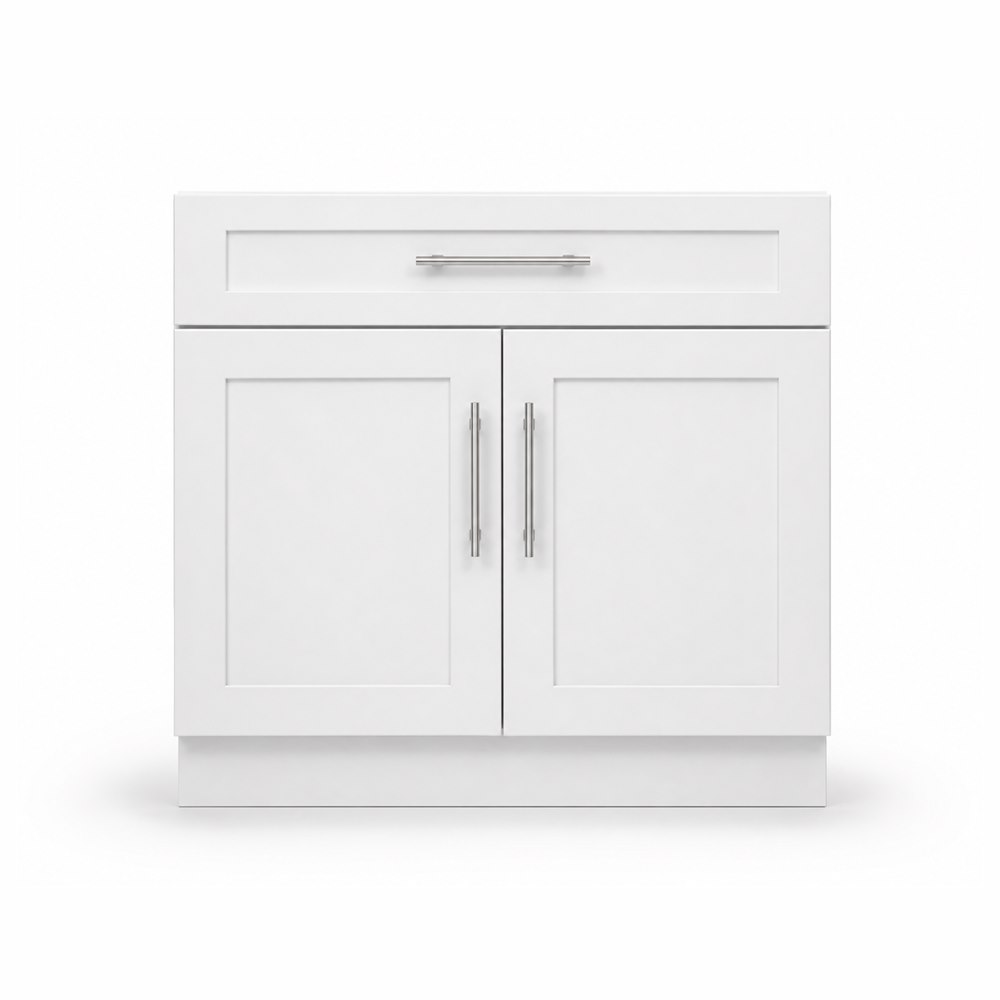
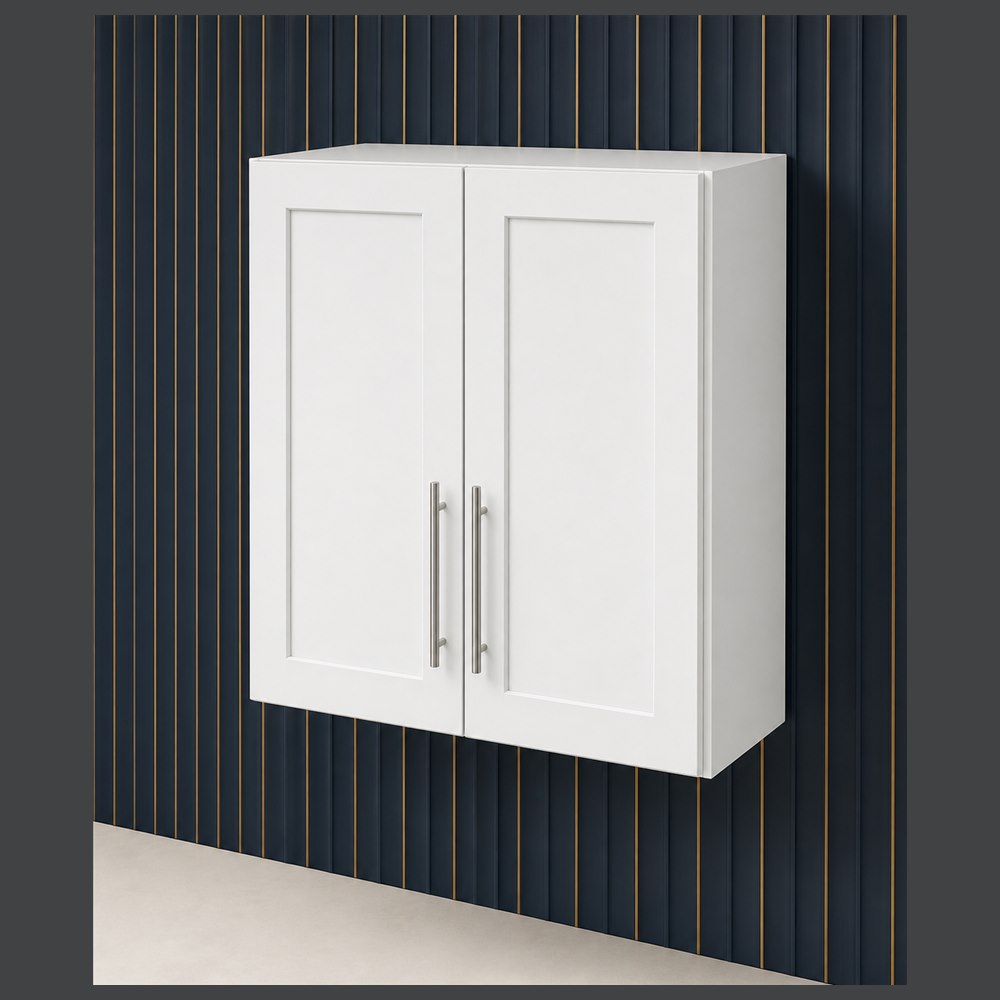
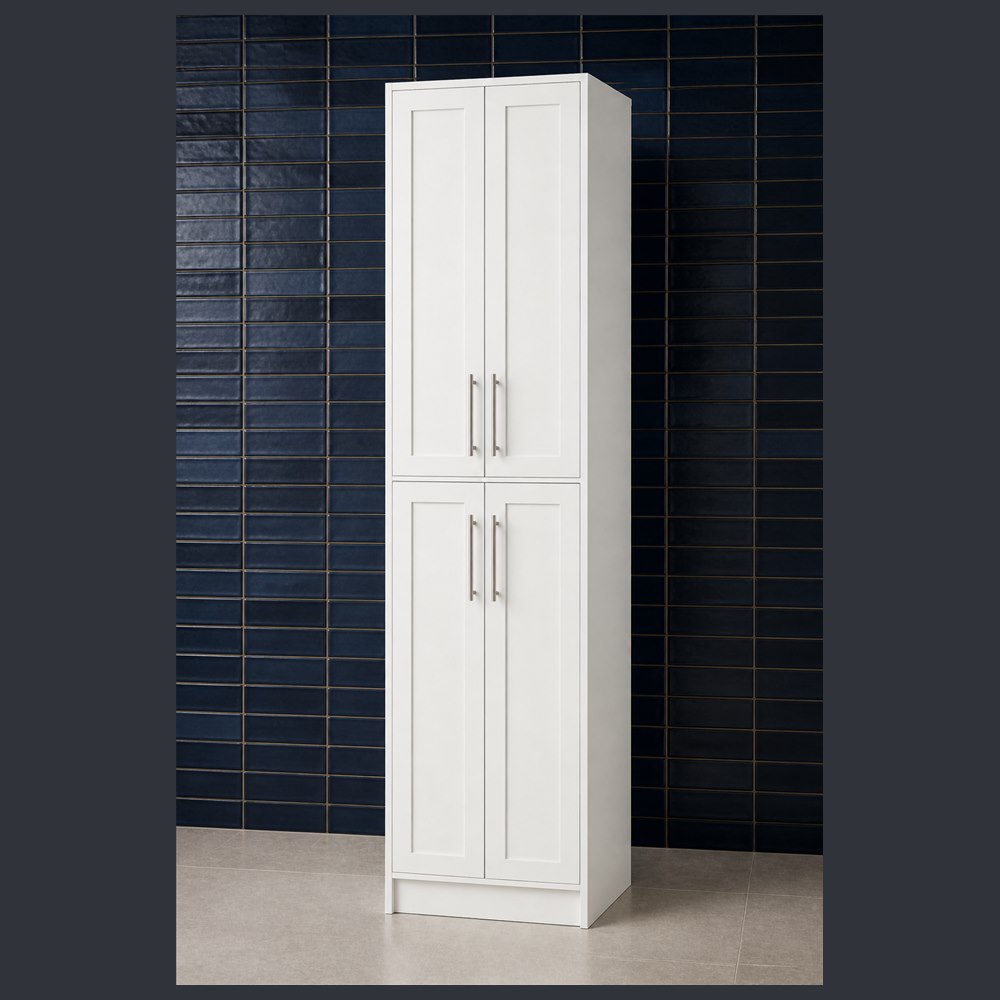
How do base, wall, and tall measurements relate?
Your wall measurements map onto three families of cabinets that share one logic. Base cabinets sit on the floor at 34 1/2 inches tall and 24 inches deep; wall cabinets hang 12 inches deep in 30-, 36-, or 42-inch heights; tall pantry cabinets run 84 to 96 inches to match your ceiling. All three step in 3-inch width increments, so the wall length you recorded resolves into a short menu of standard widths plus a filler.
This is where the ceiling height and soffit notes pay off. On an 8-foot ceiling, a 30-inch wall cabinet leaves a traditional soffit gap, a 36-inch cabinet nearly closes it, and a 42-inch cabinet runs almost to the ceiling for full-height storage; an 84-inch pantry lines its top up with 30-inch uppers so the whole upper edge of the kitchen reads as one clean line. Because depth is fixed — 24 inches for base and tall, 12 for wall — a sink base and a drawer base sit at the same projection and the counter installs straight. Our companion kitchen cabinet sizes and dimensions guide lays out the full menu of standard widths, heights, and depths so you can match each measurement to a real box.
How do you turn measurements into a cabinet list?
Turn your sketch into a cabinet list in four passes: fix the appliances and sink to their openings, fill each run with the widest standard widths that fit, step down to narrower boxes near corners, and absorb the leftover inches with a filler strip. Do the base run first, mirror it with wall cabinets, then cap the ends with tall pantries. The 3-inch grid means the boxes you choose are ones you can actually order.
Start from the anchors that cannot move — the sink under the window, the range opening, the refrigerator slot — then fill between them with standard widths from largest to smallest and let a filler take up the remainder at the wall or corner. A tall pantry anchors the end of a run and lines up with the top of the wall cabinets above. If you are also assembling the cabinets yourself, our step-by-step guide to assembling RTA cabinets walks through the cam-lock sequence once your boxes arrive.
From there the catalog does the rest. Browse the full lineup by category on the cabinet catalog, where every unit lists its exact width, height, and depth, then match each opening on your sketch to a box. Once your measurements are ready, order a door sample to confirm the finish and build before you place the full order. Not sure which widths add up to your wall? Send your measurements and a sketch with a free quote request and the sizes get specified for you — filler strips and corner units included — built to the same all-plywood box with solid-wood Shaker doors, soft-close hardware, and CARB P2-compliant panels across the line.
Keep reading
- Kitchen Cabinet Sizes & Dimensions: The Complete Guide
Base, wall, and tall cabinets follow a short menu of standard sizes. Here are the widths, heights, and depths that matter — and how each number maps to a cabinet you can order.
- How to Assemble RTA Cabinets: A Step-by-Step Guide
Ready-to-assemble cabinets arrive flat and go together with a handful of basic tools. A clear, step-by-step walkthrough of the cam-lock sequence, the back panel, mounting doors, and dialing in soft-close.
Ready to plan your kitchen?
Send us your layout for a free, no-obligation quote, or browse the full factory-direct catalog of all-plywood Shaker cabinets.