
How to Paint Oak Cabinets: Smooth, Lasting Finish
By TC Wholesale Cabinetry · Editorial team
September 9, 2026 · 9 min read
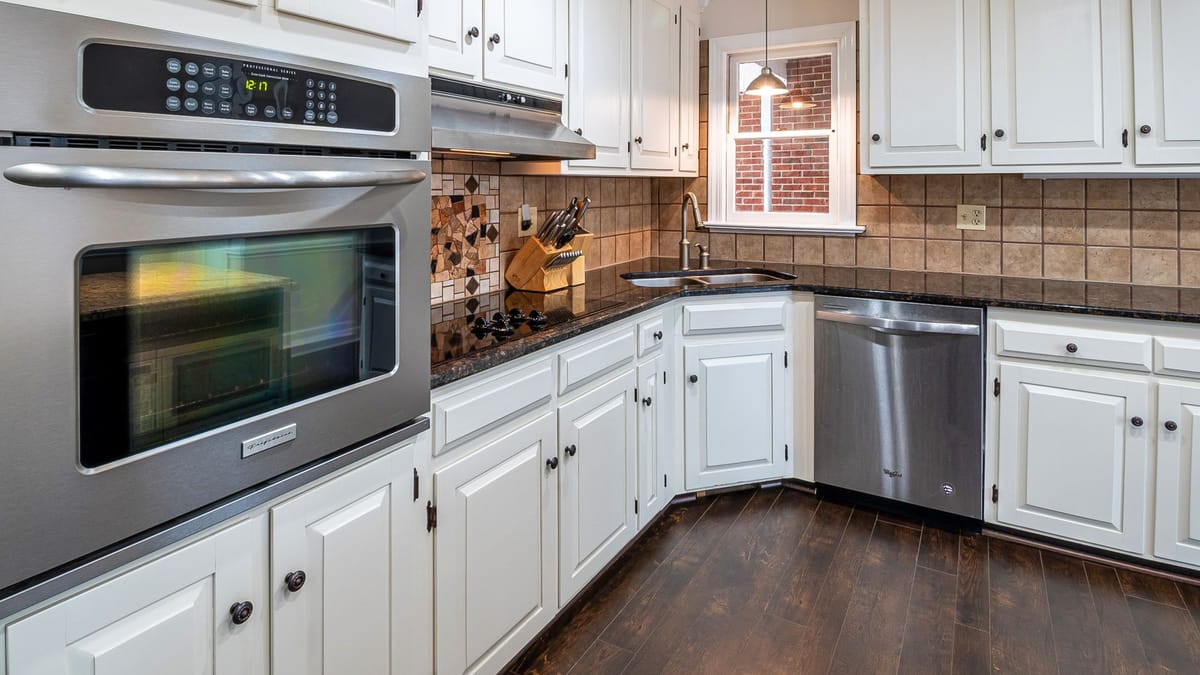
Painted oak cabinets divide opinions because most of them were painted badly — grain telegraphing through every door, yellow stains blooming around the knots, brush marks frozen into the finish. None of that is oak's fault. Oak takes paint beautifully when you treat it like oak: fill the open grain if you want smooth, lock tannins behind a shellac-based primer, and finish with cabinet-grade enamel, not wall paint. Skip any one of those steps and the wood will embarrass you within a year.
A note on us, stated plainly: TC Wholesale Cabinetry sells new all-plywood cabinets — we don't offer painting services, so this guide has no reason to steer you toward paint or away from it. Read it as a technique reference from people who know cabinet construction, not a sales pitch.
Why oak is harder to paint than maple or birch
Oak makes the difficulty list for three reasons, and each one demands its own answer in your coating system. First, open grain: red and white oak have deep, porous earlywood that drinks the first coat unevenly and leaves dark valleys visible under paint — the textured look people complain about is just unfilled grain showing through a thin film. Second, tannin bleed: oak is rich in water-soluble tannins that migrate into water-based coatings and dry as yellow-brown stains, especially around knots, cathedral patterns, and end grain. Third, previous finishes: most oak cabinets in American kitchens carry decades of cooking grease, furniture polish, and worn polyurethane, and paint bonds to whatever is on the surface — contamination included.
- Open pores need filling, not extra paint. Piling on more topcoat to hide grain wastes material and still fails — thick paint bridges pores temporarily, then shrinks back and cracks over the valleys. Grain filler levels the surface before primer ever goes on.
- Tannins need shellac, not hope. Standard latex and even many bonding primers let tannins through on oak. A shellac-based primer is the reliable stain blocker for this species — more on the exact primer choice below.
- Grease needs chemistry, not sandpaper alone. Sanding drives grease deeper instead of removing it. Degrease first with a dedicated degreaser or TSP substitute, rinse, let dry fully, then sand — in that order, every time.
- Detail profiles multiply every mistake. Arched and cathedral oak doors collect filler in corners, hold grease in crevices, and show brush marks on curves. Budget extra prep hours for detailed fronts versus flat slabs.
Keep the grain showing or fill it smooth?
This is the first decision, and it shapes the whole project — labor, materials, and the final look. There is no wrong answer, only mismatched expectations. A filled, glass-smooth finish reads modern and matches new factory-painted cabinets; visible grain reads rustic, farmhouse, or traditional, and it cuts the hardest labor step entirely. Decide before buying anything, because grain filler is the longest, dustiest phase of the job and you cannot half-do it — a partially filled door looks worse than either honest option.
- Fill it smooth when: you want a contemporary Shaker or slab look, your kitchen is small enough that doors read as one visual plane, or you are paying a pro and want the finish to match new painted cabinetry. Expect filler plus extra sanding to roughly double prep time versus painting for visible grain.
- Keep the grain when: you like texture, the budget or calendar is tight, or the doors have deep profiles where filler is miserable to level. Two coats of quality primer plus two enamel coats still give full color coverage — the surface just keeps its oak character under the color.
- The middle ground that fails: one rushed filler coat, sanded impatiently, then painted over. Thin filler shrinks back into pores as it cures and the grain ghosts through within months. If you fill, commit to two full applications with complete dry time between them.
- Test on one door first. Pull a small door or drawer front, run your full system on it — filler, primer, two topcoats — and live with it for a week before committing the kitchen. The test door is the cheapest insurance in this entire project.
Prep: the unglamorous work that decides everything
Every failed oak paint job tells the same story at autopsy: contamination under the film or primer over unsanded gloss. Oak's deep pores hold grease that maple would release, so prep here is longer than generic cabinet-painting guides admit. Remove all doors, drawer fronts, hinges, and hardware, and label every piece with painter's tape on the hinge-cup side so rehanging is mechanical instead of puzzling. Set up sawhorses or a rack — doors painted flat collect dust and sags; doors finished vertically on a rack or drying line cure cleaner.
- Degrease twice, especially near the range. Wash every surface with a dedicated degreaser or TSP substitute, change your rinse water often, and repeat the doors nearest the stove and sink. If rinse water still beads or looks cloudy, wash again — paint cannot bond to grease.
- Scuff-sand to dull, not to bare wood. Use 120-grit on flat areas and sanding sponges in profiles until every inch of gloss is gone and the surface feels uniformly matte. You are creating a mechanical key for primer, not stripping the old finish — stop when shine is gone.
- Repair damage before filler. Fill dents, dings, and old hardware holes with solvent-resistant wood filler, let it cure fully, then sand flush. Repairs made after grain-filling sit proud and telegraph through the topcoat.
- Vacuum, tack, and control dust. Vacuum every surface and crevice, wipe with a tack cloth, and keep sanding dust out of the finishing area. Oak dust is fine and persistent — finish in a separate space from sanding whenever possible.
Grain filler: the step that makes oak look smooth
Grain filler (also sold as paste wood filler) is a thick, trowelable product made for exactly this problem: it packs into open pores and dries to a sandable solid, leaving a level plane for primer. Use a filler rated for use under paint — oil-based paste fillers and water-based grain fillers both work, but confirm the label explicitly allows topcoating with your primer system, since some finishing fillers are formulated for clear coats only. Work it across the grain with a plastic scraper or old credit card, pressing firmly so pores pack full, then scrape the excess off with the grain before it skins over.
- Plan on two applications. The first coat shrinks as solvents leave; the second fills what settled. Let each coat dry completely per the label — rushing this step is the single most common cause of grain ghosting through the final finish.
- Sand between coats with 150 to 180-grit. Sand just enough to level filler ridges without cutting through to bare wood in spots. High spots sand off easily; low pores stay filled — that contrast is the whole point.
- Mind the profiles. On arched and raised-panel doors, filler packs into inside corners where sandpaper cannot reach. Remove buildup from corners with a damp rag or shaped scraper while wet rather than digging it out after cure.
- End grain drinks filler greedily. Door edges and stile ends may need a third touch-up pass. Check edges under raking light before priming — flaws invisible head-on show clearly when light skims the surface.
If you chose the visible-grain look, skip filler entirely and move to primer — but do not skip the extra primer coat below. Unfilled pores still need sealing, and primer is what seals them.
Primer: why shellac-based wins on oak
Primer on oak does two structural jobs: it bonds the coating system to the old finish, and it seals tannins and wood resins below the topcoat. Shellac-based primer is the standard recommendation for oak because it does both aggressively — shellac bonds to nearly any clean, sanded surface and its alcohol carrier locks tannins down instead of dissolving them the way water-based primers can. Expect strong fumes and fast dry times: ventilate well, wear a proper respirator, and keep a wet edge moving because shellac primer sets in minutes, not hours. Clean tools with denatured alcohol, and plan on replacing brushes or rollers rather than nursing them.
- Apply two coats on oak, always. The first coat seals; the second catches the bleed-through spots and thin areas the first coat missed. Knots, cathedral grain, and end grain routinely spot-bleed after coat one — that is normal, and exactly what coat two is for.
- Sand lightly between primer coats. Use 220-grit to knock down nibs and raised grain after the first coat, then vacuum and tack before the second. The second coat should go over a smooth, dust-free film.
- Do not substitute plain latex primer. Standard latex and PVA primers are formulated for drywall, not tannin-rich hardwood — on oak they routinely let yellow-brown stains migrate into the topcoat within weeks. If shellac fumes are genuinely unworkable in your space, a high-quality stain-blocking oil or dedicated tannin-blocking bonding primer is the fallback, spot-tested on your worst knot first.
- Prime every surface that gets topcoat. Fronts, backs of doors, edges, and frames — tannin bleed and adhesion failure do not respect the side you cannot see. Unprimed backs absorb humidity unevenly and can warp doors over time.
Choosing enamel: the topcoat that survives a kitchen
Kitchen cabinets need cabinet-grade enamel — an alkyd, urethane-alkyd, or advanced acrylic enamel formulated to cure hard, resist blocking (doors sticking to frames), and tolerate daily grease, steam, and handling. Interior wall paint, even premium lines, stays comparatively soft and gummy on cabinet surfaces; it marks under fingernails, sticks at contact points, and scrubs poorly. Shop the paint store's cabinet, trim, or door-and-trim lines rather than the wall-paint wall, and ask specifically for a product rated for cabinetry. Satin or semi-gloss sheens are the practical defaults — they shed grease, wipe clean, and hide minor surface variation better than flat or high-gloss.
- Waterborne alkyd or urethane enamel is the DIY sweet spot. These clean up with water but cure through an alkyd-like crosslinking process to a harder film than standard acrylics. They level well enough for brushing and roll small areas cleanly.
- True solvent alkyds lay flatter but demand respect. Oil-based enamels self-level beautifully and cure rock-hard, at the cost of strong fumes, long dry times, mineral-spirits cleanup, and yellowing in low light over the years — a real consideration for white finishes.
- Plan on two finish coats minimum. Deep colors over shellac primer — navy, forest green, black — often need a third coat for full, even coverage. Buy all topcoat paint from the same batch or have it box-mixed so color stays consistent across doors finished on different days.
- Keep a labeled jar for touch-ups. Save a small sealed jar of the exact topcoat, marked with product, color code, and sheen. Chips around pulls and edges are inevitable over the years and dab-touch-ups with the identical paint melt in invisibly.
The full sequence, start to finish
Run the project as an assembly line — every door through the same station in the same order — rather than finishing one door completely before starting the next. Batch work keeps dry times honest and technique consistent:
- 1. Remove, label, and set up. Doors and drawer fronts off, hardware bagged per opening, pieces labeled on hidden faces. Sawhorses or a drying rack ready, finishing space separated from sanding dust.
- 2. Degrease twice and rinse. Every surface, both sides, with rinse-water changes. Doors near cooking zones get a third pass if water still beads.
- 3. Scuff-sand and repair. 120-grit to full matte, wood filler in damage, sand repairs flush, then vacuum and tack everything.
- 4. Grain-fill twice (smooth finish only). Pack across the grain, scrape with it, full dry between coats, 150 to 180-grit leveling sand after each. Raking-light inspection before moving on.
- 5. Shellac-prime twice. Ventilation and respirator on, fast wet edge, 220-grit sand plus tack between coats. Every surface, both sides, all edges.
- 6. Two (sometimes three) enamel coats. Correct dry time between coats per the label — not per impatience. Sand very lightly with fine grit between topcoats only if the label allows; some enamels prefer chemical adhesion between coats.
- 7. Cure before rehanging. Paint feels dry in hours but cures over days to weeks depending on product. Rehang gently, leave doors slightly ajar or use bumpers so fresh films never press together, and treat the finish gently for the first few weeks.
Spraying vs brushing oak cabinets
Spraying lays the flattest film with no brush marks — the factory look — and it is the only sane way to finish detailed oak profiles without bristle tracks in every crevice. But spraying demands equipment, a controlled space, masking discipline, and respirator-grade ventilation, plus practice: runs and dry-spray texture punish beginners fast. Brushing and rolling with quality tools and self-leveling enamel can look genuinely good on simpler fronts, especially in satin sheens that forgive minor texture. If you hire out, confirm in writing whether doors are sprayed off-site on racks or brushed in place — the two methods are different services at different prices, and our guide to hiring a cabinet painting contractor lists the exact questions that separate them.
Curing and caring for painted oak
Fresh enamel is vulnerable long after it feels dry — full hardness develops over days to weeks as the film crosslinks. Keep the kitchen ventilated, avoid hanging dish towels over fresh doors, and clean only with a soft, well-wrung cloth and mild dish soap for the first month. Never use abrasive pads or harsh degreasers on enamel; they micro-scratch the film and invite grease into exactly the scratches they made.
Long term, painted oak asks for the same routine as any painted cabinet: gentle regular cleaning beats aggressive occasional scrubbing, chips get dabbed promptly with your saved touch-up jar, and moisture sources — dripping sink traps, unvented steam, kettles parked under wall cabinets — get fixed before they blister the finish. Our cabinet cleaning guide runs the full routine, and our cabinet lifespan guide covers what the boxes underneath need to outlast the paint.
Common mistakes that ruin painted oak
- Skipping grain filler, then blaming the paint. The textured finish people hate on painted oak is unfilled grain, not bad paint. Either fill properly or choose visible grain deliberately — the failure is expecting smooth from a system that never included filler.
- Priming with latex over oak tannins. Yellow-brown bleed-through weeks after finishing is the signature of a non-blocking primer on oak. Shellac-based primer, two coats, is the prevention — there is no convenient cure once stains are under the topcoat.
- Painting over grease. Fish-eyes, peeling near handles, and finish that scratches off with a fingernail all trace back to contamination. If the surface was not surgically degreased, the topcoat is bonded to cooking residue instead of wood.
- Rushing dry and cure times. Rehung doors bonding to frames, fingerprints pressed permanently into door faces, blocking that tears paint off on first opening — all of these are chemistry interrupted. The label's times are minimums, and humid weather extends them.
- Using wall paint on cabinets. Soft film, poor blocking resistance, weak scrub tolerance. The few dollars saved per gallon buy a finish that fails at exactly the stresses a kitchen applies daily.
- Painting failing boxes. Paint cannot fix swollen particleboard, delaminating plywood, stripped hinge holes, or a layout you hate. When the boxes are the problem, price both paths in our paint vs replace comparison and our cabinet painting cost guide before spending a month painting cabinets you will still want to replace.
Questions homeowners actually ask
Can you paint oak cabinets without filling the grain?
Yes — you get full color coverage with visible oak texture under it, which suits farmhouse and rustic kitchens. Use two coats of shellac-based primer plus two enamel coats so the unfilled pores are sealed even though they remain visible. What you cannot get without filler is a smooth, factory-flat surface, so make the choice deliberately before starting.
Will the oak grain show through paint over time?
Properly filled grain stays hidden — two full filler applications, fully dried and leveled, do not reverse themselves. Grain that ghosts through months later was under-filled in the first place: one rushed coat that shrank back as it cured. If ghosting appears, the fix is sanding back and re-filling, not another coat of paint.
What primer is best for oak cabinets?
Shellac-based primer, two coats, with a light 220-grit sand between them. It bonds to sanded existing finishes and locks oak tannins below the topcoat better than latex or general-purpose bonding primers. Ventilate well and wear a respirator — the alcohol carrier that makes it effective also makes it fumy.
What kind of paint holds up best on oak cabinets?
Cabinet-grade enamel — a waterborne alkyd or urethane-alkyd for most DIY projects, or a solvent alkyd if you accept the fumes and dry times. Interior wall paint is the wrong product regardless of brand: it cures too soft for doors that get touched, bumped, and scrubbed daily.
How long does painted oak last?
A complete system — degreased, filled, shellac-primed twice, two enamel coats, fully cured — holds up for many years in a normal kitchen, with high-touch zones around pulls wearing first and touching up easily. Rushed work over grease or single-coat primer can chip and stain within a season or two. Cure discipline and gentle early cleaning matter as much as product choice.
Should I paint my oak cabinets or replace them?
Paint when the boxes are solid, the layout works, and only the color and grain date the kitchen. Replace when boxes are swollen or delaminating, hinges strip out, storage falls short, or a pro paint quote climbs near replacement money. Our refacing vs replacing guide covers the middle path of new doors on sound boxes.
Weighing fresh paint against fresh boxes? The cabinet catalog lists all-plywood construction across every size, and our replacement cost guide runs the per-tier math for new cabinetry. Price both sides before committing a month of weekends.
Still deciding between painting your oak cabinets and starting fresh? Request a free quote on new all-plywood cabinets — one replacement number turns any paint plan into an informed decision.
Keep reading
- Cost to Paint Kitchen Cabinets: 2026 Price Guide
Professional cabinet painting runs $425–$6,500 depending on finish type — sprayed enamel at the top, brush work at the bottom. Here is the per-door, per-foot math behind every quote, plus when paint stops being worth it.
- Cost to Paint vs Replace Cabinets: Which Saves More?
A pro spray-enamel paint job typically runs $3,000–$9,000 — 60–70% less than new boxes. But paint only rescues kitchens whose boxes and layout deserve rescuing. Here is the box test that decides.
- Hire a Cabinet Painting Contractor: 12 Questions
A skilled cabinet painter makes old boxes look factory-new; a careless one leaves brush marks and chips within a year. Where to find candidates, what to ask, how to compare quotes fairly, and what belongs in the contract.
- How to Clean Kitchen Cabinets Without Damaging Them
Most cabinet finishes need the same gentle routine: mild dish soap, a soft well-wrung cloth, a rinse wipe, and a full dry. Here is how that changes by finish — and what to avoid.
- How Long Do Kitchen Cabinets Last? Lifespan by Material
A kitchen cabinet's life runs 20 to 50 years, and the spread is decided by five things: box material, hardware, install quality, moisture, and care. Here is how each one moves the number.
Ready to plan your kitchen?
Send us your layout for a free, no-obligation quote, or browse the full factory-direct catalog of all-plywood Shaker cabinets.