
Under-Sink Vanity Cabinets: Sizes & Plumbing Guide
By TC Wholesale Cabinetry · Editorial team
September 9, 2026 · 8 min read
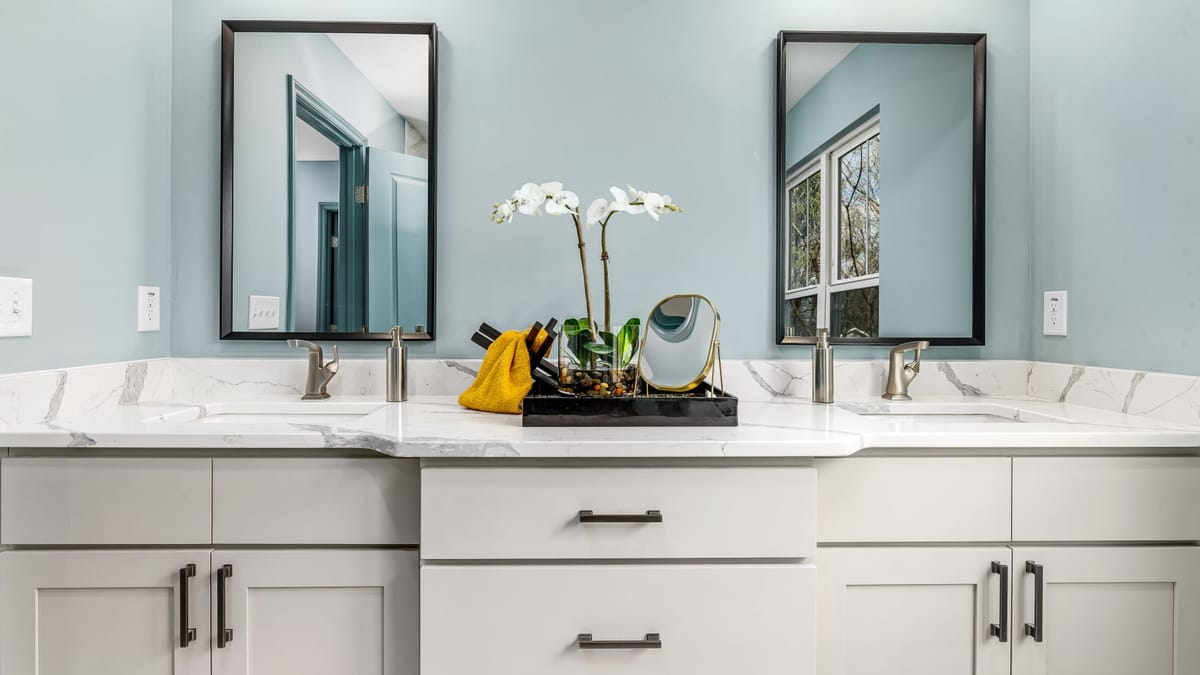
Every bathroom vanity is an under-sink vanity cabinet in the literal sense — the box lives under the sink and the drain runs through it. But the term usually means the design problem, not the furniture: a cabinet whose interior is shared with a P-trap, supply lines, and a shutoff valve or two, and whose doors, drawers, and back panel all have to work around them. Get that negotiation right and the vanity looks like ordinary furniture while swallowing the ugliest plumbing in the house. Get it wrong and every morning starts with a door banging a tailpiece.
Start with the sizing baseline in our bathroom vanity sizes guide — 34½ inches high, 21 inches deep, 24 to 60 inches wide — then come back here for the under-sink specifics: how the plumbing eats into each width, which interiors survive it, and how to keep the whole thing dry. If you are ready to set the box, the how to install a bathroom vanity guide walks through the process step by step.
Standard under-sink vanity sizes
The box itself follows standard vanity dimensions: 34½ inches high before the top, 21 inches deep, and widths of 24, 30, 36, 48, and 60 inches. What changes under the sink is usable space, because the drain assembly claims the center of the cabinet. In a 24-inch single-sink vanity, the trap and supplies can consume most of the middle third, leaving two usable pockets on either side — fine for a powder room where the vanity holds hand soap and spare rolls, tight for a daily-use bath. A 30 or 36-inch box gives the same centered trap but adds genuine storage on both flanks, which is why 36 inches is the sweet spot for a single-sink family bath: one side for cleaning bottles, one for toiletries, plumbing down the middle.
At 48 inches you reach the crossover width — a roomy single sink with deep storage on both sides, or a snug double for children. At 60 inches the double sink breathes, with each trap occupying its own zone and a usable stack of storage between them. Depth matters too: the standard 21-inch depth exists partly to leave clearance between the trap and the doors, so resist the urge to push the drain rough-in too far forward. And note the finished height — once the top and sink go on, the surface lands near 36 inches, which sets both comfortable reaching over the bowl and the mirror height above it.
- 24 inches: powder rooms and tight baths; single sink only, with narrow storage pockets flanking the trap.
- 30 inches: the compact full-bath single — enough room on both sides of the drain for daily toiletries.
- 36 inches: the family-bath sweet spot; one flank for tall bottles, one for small items, trap centered.
- 48 inches: generous single with deep side storage, or a tight double sink for kids sharing a bath.
- 60 inches: the comfortable double — each sink gets roughly a 30-inch zone with storage between the traps.
Plumbing cutouts: fitting the box around the pipes
Vanity cabinets ship with either an open back or a removable back panel for exactly this reason — unlike a kitchen base cabinet, the back is meant to yield to the wall plumbing. The standard approach is to set the cabinet in place, mark where the drain stub-out and supply lines meet the back, and cut openings just large enough to pass them, leaving the rest of the panel intact for rigidity and a finished look. A hole saw handles round supply penetrations cleanly; a jigsaw opens the larger rectangular notch the trap arm usually needs. Cut from the finished face side with painter's tape on the cut line to keep edges crisp, and seal every raw cut edge — exposed cores wick moisture from the one cabinet in the house guaranteed to see it.
Measure twice, in two dimensions: the horizontal centers of the drain and supplies off the side wall, and their heights off the finished floor. Compare both against the cabinet's interior before cutting — the most common mistake is notching for the drain while forgetting the supply valves sit several inches to either side and several inches lower. Leave service clearance around every valve so a future washer replacement does not require removing the cabinet, and keep the trap arm's slope in mind: the drain enters the wall slightly lower than it leaves the tailpiece, so the notch needs vertical room, not just a round hole. If the rough-in lands high or off-center enough to collide with a drawer box, that is the moment to switch the interior layout — split drawers, a U-shaped cutout drawer, or doors-only — rather than forcing the plumbing to move.
- Mark in place: set the cabinet against the wall and transfer drain and supply positions directly — never cut from plans alone.
- Size for service: openings should pass valves and escutcheons with room to spare, so future repairs need no demolition.
- Seal raw edges: every cut exposes core material; seal it the same day against under-sink humidity.
- Check drawer clearance: confirm drawer boxes clear the trap through their full travel before finalizing the layout.
False fronts, split drawers, and U-shaped storage
The top few inches of an under-sink vanity sit directly behind the sink bowl, where no usable drawer can ever run — that is why vanities use a false drawer front across the top. It keeps the furniture lines consistent with neighboring drawer stacks while hiding the bowl and trap behind it. Better versions hinge or tilt out, turning dead space into a shallow tray for sponges, rings, and the toothpaste tube that otherwise colonizes the counter. When ordering, confirm whether that top front is fixed or tip-out — the upgrade costs little and rescues the only storage zone at hand height.
Below the false front, you have three honest options. Doors with an open interior are the simplest and most forgiving: nothing collides with the trap, tall bottles fit anywhere, and pull-out organizers can be added later around the actual pipe positions. Split top drawers — two shallow drawers flanking a center plumbing chase — recover real storage on both sides of the trap in 36-inch and wider boxes. U-shaped cutout drawers wrap around the trap, giving one wide drawer with a notch for the pipes; they hold the most but demand accurate trap measurements, since a repiped drain can strand the notch in the wrong place. For narrow 24-inch boxes, skip drawers under the sink entirely and put your drawer storage in a side base or linen column instead.
Moisture protection: the cabinet that always gets wet
No cabinet in the house faces more water than the one under the sink — slow supply-valve seeps, condensation sweating off the trap in summer, splash-over from the bowl, and the occasional full-bore leak. The defense is layered, and it starts before installation. Choose plywood box construction over particleboard if the budget allows; plywood tolerates incidental wetting and dries out, while particleboard swells irreversibly at cut edges. Our moisture damage prevention guide covers the material science in full, and every point there applies double under a sink. Caulk the joint where the countertop meets the wall and where the sink meets the top — those two seams are the entry points for nearly all routine water.
Inside the cabinet, line the floor with a waterproof tray or mat with a lipped edge, so the first sign of a leak is water sitting in the tray rather than soaking into the cabinet floor. Keep a battery leak detector behind the trap — a small device that pays for itself the first time a valve weeps at midnight. Ventilate the interior: doors that sit slightly proud, a back panel with a modest air gap, or simply opening the doors after steamy showers all prevent the chronic damp that grows mildew on stored bottles. And build a twice-a-year habit from our cabinet cleaning guide: pull everything out, wipe the floor, check supply connections with a dry hand, and confirm the trap is dry. Five minutes, twice a year, prevents most under-sink disasters.
- Plywood over particleboard: the box material most likely to survive incidental wetting and dry out intact.
- Seal and caulk: top-to-wall and sink-to-top seams closed; every plumbing cut edge sealed the day it is cut.
- Tray plus detector: a lipped waterproof mat contains drips and a leak sensor announces them early.
- Ventilate and inspect: airflow after steamy showers, and a full pull-out inspection twice a year.
Wall-hung vs floor-standing under-sink cabinets
The mounting decision changes how the vanity looks, cleans, and plumbs. A floor-standing vanity anchors to the wall through its back rail and rests its weight on the floor — installation is forgiving, the toe-kick hides shims and uneven floors, and the enclosed base conceals the full drain run down to the floor. It suits family baths, retrofits where the drain stub-out sits low, and anyone who wants maximum hidden storage per dollar. The trade-off is the toe-kick itself: it traps dust and mop water, and visually the box reads heavier in a small room.
A wall-hung (floating) vanity bolts to blocking or studs and carries its full loaded weight — cabinet, top, sink, water — on the wall, leaving the floor open beneath. The payoff is real: small baths read larger with visible floor running wall to wall, mopping takes one pass with nothing to work around, and the floating line looks current in a way floor-standing boxes cannot match. The demands are real too: the wall must carry several hundred pounds, so blocking or confirmed stud anchoring is non-negotiable, and the drain and supplies stay partly visible below the box unless a bottle trap or a shallow shroud dresses them up. Our floating vanity guide details mounting heights, weight ratings, and the open-plumbing question at length — read it before choosing. As a rule of thumb: float the powder room and the style-forward primary bath, stand the hardworking family bath on the floor.
Frequently asked questions about under-sink vanities
Do vanity cabinets come with backs?
Most vanity sink bases ship with an open or removable back precisely so wall plumbing can pass through. Plan to cut fitted openings for the drain and supplies during installation, and seal every cut edge against moisture the same day.
How do I work around the P-trap inside the cabinet?
Design the interior around it: doors with open space are the most forgiving, split drawers flank the trap in wider boxes, and U-shaped drawers wrap around it where measurements are certain. Always confirm drawer boxes clear the trap through their full travel before finalizing.
What is the false drawer front under the sink for?
The space directly behind the sink bowl cannot hold a working drawer, so the top front is a false panel that keeps the furniture lines consistent. Tip-out versions turn that dead strip into a shallow tray for small items at hand height.
How do I protect an under-sink cabinet from water damage?
Layer the defense: plywood construction, caulked top seams, sealed cut edges, a lipped waterproof tray on the cabinet floor, and a battery leak detector behind the trap. Pull everything out twice a year to wipe down and check connections by hand.
Is a wall-hung or floor-standing vanity better?
Neither wins outright. Wall-hung makes small baths feel larger and mopping effortless but needs solid wall anchoring and dresses up exposed plumbing. Floor-standing installs forgivingly, hides the full drain run, and maximizes storage per dollar — the safer pick for family baths.
What size under-sink vanity do I need for one sink?
A 30-inch box is the compact answer and 36 inches the comfortable one for a daily-use single sink, with storage flanking the centered trap on both sides. Drop to 24 inches for powder rooms; step to 48 for a sprawling single with deep side storage.
Know your width and your trap position? Send both and we'll specify the box, interior, and top around them — request a free quote and we'll take it from there.
Keep reading
- Bathroom Vanity Sizes: 24 to 60-Inch Guide
Vanities are kitchen base cabinets narrowed to 21 inches deep — same 34½-inch height, widths from 24 to 60 inches. Here is which width fits which bathroom, single vs double sink, and the small-bath tricks.
- Floating Bathroom Vanity Guide: Sizes & Mounting
A floating vanity bolts to the wall and leaves the floor open, so a small bathroom reads bigger and cleans easier. Here are the right widths, the 32 to 36-inch mounting height, what wall plumbing demands, and when legs win instead.
- How to Install a Bathroom Vanity Step by Step
A vanity install is six jobs in a trench coat: shut off the water, pull the old cabinet, level the new base against the wall, set the top, reconnect the P-trap, and seal everything with silicone. Here is the order that avoids callbacks.
- Cost to Replace a Bathroom Vanity: 2026 Guide
Replacing a bathroom vanity usually lands between $700 and $4,500 all-in — the box, the plumber and installer, plus the top, sink, and faucet. Here is what each line costs and where DIY actually saves.
- How to Prevent Moisture Damage to Kitchen Cabinets
Swollen edges, bubbling paint, and soft sink bases all start the same way: small, repeated moisture that nobody dries. Here is how to shut off each source before the box itself is damaged.
- How to Clean Kitchen Cabinets Without Damaging Them
Most cabinet finishes need the same gentle routine: mild dish soap, a soft well-wrung cloth, a rinse wipe, and a full dry. Here is how that changes by finish — and what to avoid.
Ready to plan your kitchen?
Send us your layout for a free, no-obligation quote, or browse the full factory-direct catalog of all-plywood Shaker cabinets.