
Kitchen Cabinet Layouts and Fillers: L, Galley, U
By TC Wholesale Cabinetry · Editorial team
September 8, 2026 · 10 min read
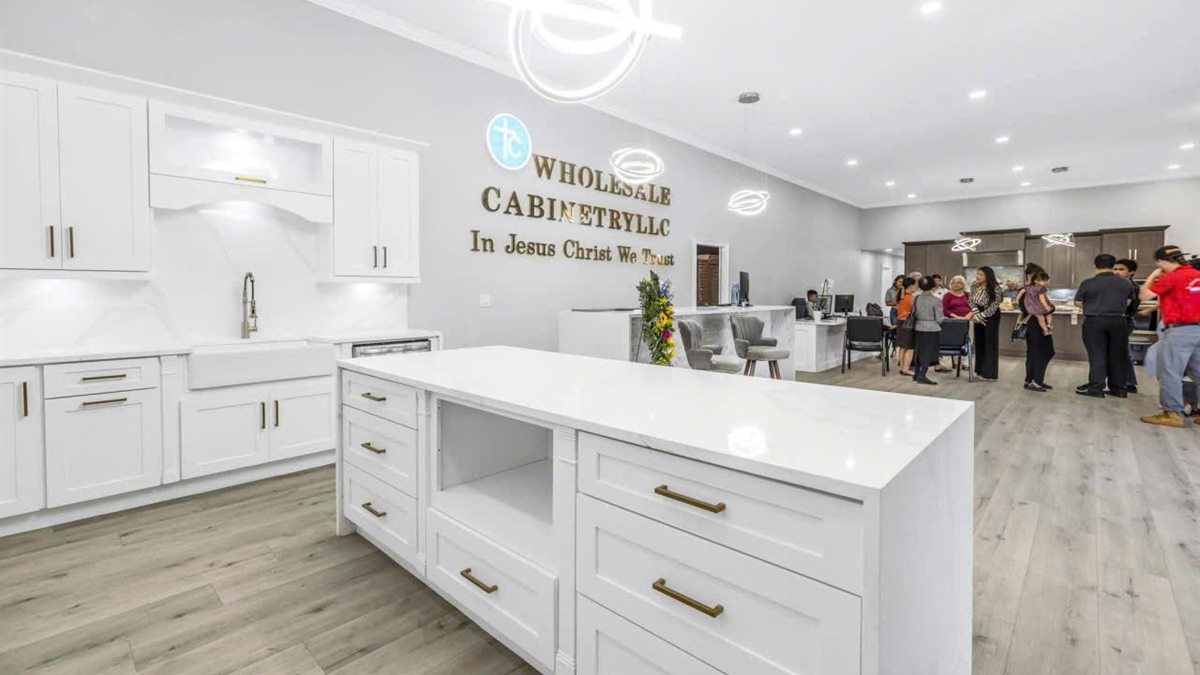
Stock cabinets come in fixed 3-inch width increments, but no real wall measures in neat 3-inch multiples — and no real wall is perfectly straight. Layouts decide where the boxes go; fillers absorb everything the boxes can't. Get both right on paper and the install goes smoothly; skip them and you end up ripping a cabinet, reordering, or staring at a 2-inch gap beside the fridge. This guide covers the three layouts that fit nearly every US kitchen, the clearances each one needs, and exactly when and how wide to plan filler strips.
Already have your room dimensions? Start with our how-to-measure guide to capture wall lengths, openings, and out-of-square corners, and keep the cabinet sizes guide open beside this one for the box dimensions each run is built from.
L-shape layouts: the flexible default
The L-shape runs cabinets along two adjacent walls and suits small-to-medium and open-concept kitchens — it holds an efficient work triangle on one side while leaving the other side open for an island, peninsula, or dining table. Plan the range or cooktop on one leg and the sink on the other with the refrigerator at either end, so the three work points form a triangle rather than a straight line. The inside corner needs a corner solution — a blind corner cabinet, a Lazy Susan base, or a void corner with drawer stacks on both sides — and that corner is also where your first filler usually lives, so doors on adjacent runs don't collide. L-shapes tolerate imperfect rooms well: if one wall runs long, the extra inches land in the open end of a run, where a filler or an end panel absorbs them invisibly.
Galley layouts: two walls, one corridor
The galley places cabinet runs on two opposing walls with a single walkway between them — the most space-efficient layout for narrow kitchens and the classic footprint for apartments and older homes. Put the sink and dishwasher on one side and the range and refrigerator on the other so two cooks can work back to back without crossing paths. The corridor width decides whether a galley works or fails: NKBA planning guidelines call for a minimum of about 42 inches between opposing runs for a single cook and 48 inches where two people work or an appliance door swings into the aisle. Under about 36 inches, opposing drawers and appliance doors collide and the kitchen feels like a hallway; if your corridor measures tight, keep one run shallow (12-inch-deep pantry or reduced-depth bases) rather than squeezing two full-depth runs into a gap that can't hold them. Tall items — the fridge, a tall pantry cabinet, the oven stack — belong at the ends of runs, never mid-corridor where they pinch the walkway and block light.
U-shape layouts: maximum storage, strict clearances
The U-shape wraps cabinets around three walls and delivers the most storage and countertop of any layout without an island — ideal for larger closed kitchens and serious cooks. It naturally hosts two work zones, typically a cooking triangle (range, fridge, prep area) on one side and a cleanup zone (sink, dishwasher, trash) on the other. The price of all that storage is clearance discipline: NKBA guidelines call for a minimum of 60 inches between the opposing arms of a U, so drawers, dishwasher doors, and people can share the middle without collision. A U with arms closer than about 48 inches turns into a trap — two open dishwasher or drawer fronts meet in the middle. U-shapes also create two inside corners, which means two corner cabinets and usually two fillers; budget both before you fall in love with the storage total. If the room is wide enough, a U with an island in the center is the luxury version — but the island needs at least 42 inches of aisle on every working side, 48 where seating or appliance doors face it.
The rules that make any layout work
Three planning rules from the NKBA kitchen planning guidelines apply no matter which shape you pick:
- Work triangle: each leg (sink–range, range–fridge, fridge–sink) should run 4 to 9 feet, with the three legs totaling no more than 26 feet. Under 4 feet feels cramped; over 9 feet turns cooking into cardio.
- Walkways and aisles: 42 inches minimum for a work aisle used by one cook, 48 inches where two cooks work or appliance doors swing into the path, and 36 inches minimum for a walk-behind passage with no work happening. Measure aisles from countertop edge to countertop edge — countertops overhang boxes by about an inch per side.
- Landing space: plan at least 15 inches of counter beside the range and sink sides that need it, and 15–18 inches beside the refrigerator handle side, so hot pans and full grocery bags have somewhere legal to land. A layout that hits the triangle numbers but strands the range with no landing zone still fails daily.
What is a cabinet filler strip?
A filler is a narrow finished strip — same material and finish as your cabinets — installed between a cabinet and a wall, between two cabinets meeting in a corner, or beside an appliance. It does three jobs: it absorbs the leftover inches when stock-width boxes don't add up to the wall length, it pushes doors and drawer fronts clear of walls and adjacent hardware so nothing binds, and it covers the shadow gaps left by out-of-square walls so the run reads as one continuous wall of cabinetry. Fillers are ordered oversize and ripped to fit on site — cabinet makers typically sell them in 3-inch and 6-inch nominal widths — so the plan calls out where fillers go and roughly how wide, and the installer cuts the exact width during install.
When do you actually need fillers?
- At every wall end of a run: walls are never plumb, so a cabinet hard against a wall binds its door or leaves a wedge gap. Plan a wall filler on each run that dies into a wall — this is the most common filler in the kitchen.
- Inside corners: where two runs meet at 90 degrees, the doors and handles on one run swing across the drawer fronts of the other. Corner fillers (often called blind-corner pull or angle fillers) hold the runs apart so everything opens.
- Beside appliances: ranges, dishwashers, and refrigerators need clearance for their own doors plus the adjacent cabinet's door swing and handle projection — dishwasher and range ends commonly need wider fillers than plain wall ends.
- Where stock widths leave a gap: boxes step in 3-inch increments, so a 118-inch wall of 3-inch-multiple boxes always leaves a remainder. A filler split across both ends of the run looks far better than one wide strip on a single side.
- Around tall and deep items: refrigerator panels, oven cabinets, and pantry ends against walls typically need fillers so tall doors clear baseboard, casing, and door trim.
The one place you usually skip fillers: freestanding-style ends and island ends that finish with a decorative end panel. If nothing binds and no wall gap exists, a panel alone gives the cleaner look.
How wide should filler strips be?
Order fillers oversize and let the installer rip them down — but the plan still needs a sensible target width at each spot. These are US cabinetmaker conventions reflected across trade guides and installer forums, not manufacturer specs:
- Wall ends, framed/full-overlay doors: plan at least 1 inch so the door and handle clear the wall; 1/2 inch is the cited bare minimum for tight framed runs, but full-overlay doors with projecting handles want a full inch or more.
- Inside corners: plan about 3 inches per side as the working standard — enough for a door plus handle to swing past the perpendicular drawer fronts.
- Beside dishwashers and ranges: plan 3 to 6 inches where an appliance door and a cabinet door share an edge, sized to the appliance spec plus handle projection.
- Pure gap fillers (no swing involved): whatever the math leaves — but split remainders over 3 inches across both ends of the run, and never plan a filler under about 3/4 inch wide, which looks like a sliver and is hard to fasten cleanly. Rebalance the run (swap a 30-inch box for a 27, for instance) instead.
- Height and thickness: base fillers typically ship around 30-1/2 inches tall to match 34-1/2-inch boxes under the countertop, wall fillers match the wall-cabinet height, and thickness matches the face frame or box side (3/4 inch typical for frameless). Confirm against the base cabinet sizes in your order.
Planning checklist: from room to order
- Pick the shape from the room, not the catalog: narrow single-corridor rooms get a galley, two-wall rooms with an open side get an L, three-wall rooms with 60-plus inches of middle get a U. Forcing a U into a 9-foot-wide room guarantees binding drawers.
- Place sink, range, fridge first: check the 4-to-9-foot legs and the 26-foot total before placing a single box. Move appliances on paper — it costs nothing there.
- Lay boxes in 3-inch steps, then compute remainders: fill each wall with standard boxes, note the leftover inches, and assign fillers to wall ends and corners before ordering.
- Order fillers oversize, plus one spare: fillers are cheap, reorder shipping is not. A spare 6-inch filler in the same finish has saved more installs than any other ten dollars in the project.
- Flag appliance specs early: range widths, fridge door swing with handles, and dishwasher proximity to corners change filler widths — pull the spec sheets before finalizing the plan, not after delivery.
- Note out-of-square walls on the plan: measure each wall at counter height and at floor level at both ends; a wall that drifts 1/2 inch over 10 feet eats a narrow filler entirely, so mark it for the installer.
Layout and filler questions, answered
Can I avoid fillers with custom-size cabinets?
Custom shops can build odd widths, but corner clearance fillers are still needed wherever doors swing across perpendicular fronts — physics doesn't discount for custom. With stock and semi-custom boxes in 3-inch steps, wall-end fillers are simply part of the system; budget them from the start instead of treating them as a fix.
Should fillers match the door or the box?
The visible face of the filler should match the doors and drawer fronts — same finish, same sheen. Check the match in your own kitchen light before install day; whites drift between batches, so order samples with the cabinet order and compare fillers alongside doors.
Do islands and peninsulas need fillers?
Islands need them wherever a run meets a waterfall panel, a seating overhang support, or an appliance like a microwave base or a sink base turned into a prep sink. Peninsula ends that die into a wall follow the same wall-filler rule as any other run.
How is this different from measuring or cabinet sizes?
Measuring captures the room as it is, sizes tell you what each box is, and this guide arranges the boxes into a working kitchen. Use all three in order: measure the room, pick the layout and clearances here, then pull exact box dimensions from the sizes guide to fill each run.
Once the plan is on paper, price the boxes that fill it — browse the cabinet catalog for every stock width the runs above assume, and note which runs end at walls so the quote includes the right filler count.
Send your wall lengths and layout pick — request a free quote and we'll price the boxes, corner solutions, and fillers to fit your exact runs.
Keep reading
- How to Measure Your Kitchen for New Cabinets
A clear, repeatable way to measure your kitchen for new cabinets — wall-to-wall lengths, where to mark windows, doors, outlets, and appliances, and the working clearances that keep a layout livable.
- Kitchen Cabinet Sizes & Dimensions: The Complete Guide
Base, wall, and tall cabinets follow a short menu of standard sizes. Here are the widths, heights, and depths that matter — in printable tables where every row maps to a cabinet you can order.
- Base Cabinet Sizes & Types: Standard Dimensions Explained
Every base cabinet is 34½ inches high and 24 inches deep — width is the only variable. Here are the standard widths and the six types that cover almost every kitchen, each linked to a real cabinet spec.
- Corner Cabinets and Lazy Susans: Sizes That Work
The corner is where kitchens lose storage. Here is how blind corners, lazy susans, and easy-reach cabinets compare on size, access, and cost — and which one fits your layout.
Ready to plan your kitchen?
Send us your layout for a free, no-obligation quote, or browse the full factory-direct catalog of all-plywood Shaker cabinets.